 Enjoy Tribute Enjoying local, sustainable and organic goodness in The Woodlands
Pelmeni is the food of winter. These dumplings now commonly served in every Russian restaurant, originally fed the hardy people of Siberia. Modern day Russians and Eastern Europeans fill pelmeni with a mixture of pork and beef, but moose and other game used to fill the pelmeni of the indigenous hunter societies of Northern Russia. Due to the arctic cold temperatures, pelmeni could be left out and would freeze quickly. Thus, before long trips, hunters would fill their sacks with frozen, preserved pelmeni on their search for more game.
I can count the times I’ve experienced intense cold in my life with my hands. While I love witnessing the change in seasons, snow and all included, I count myself lucky I’ve been complaining about the 2°C in Houston right now. A moment of silence goes to my comrades in the north and to my brother who just got his ticket to Houston cancelled because of the Thor snow storm.
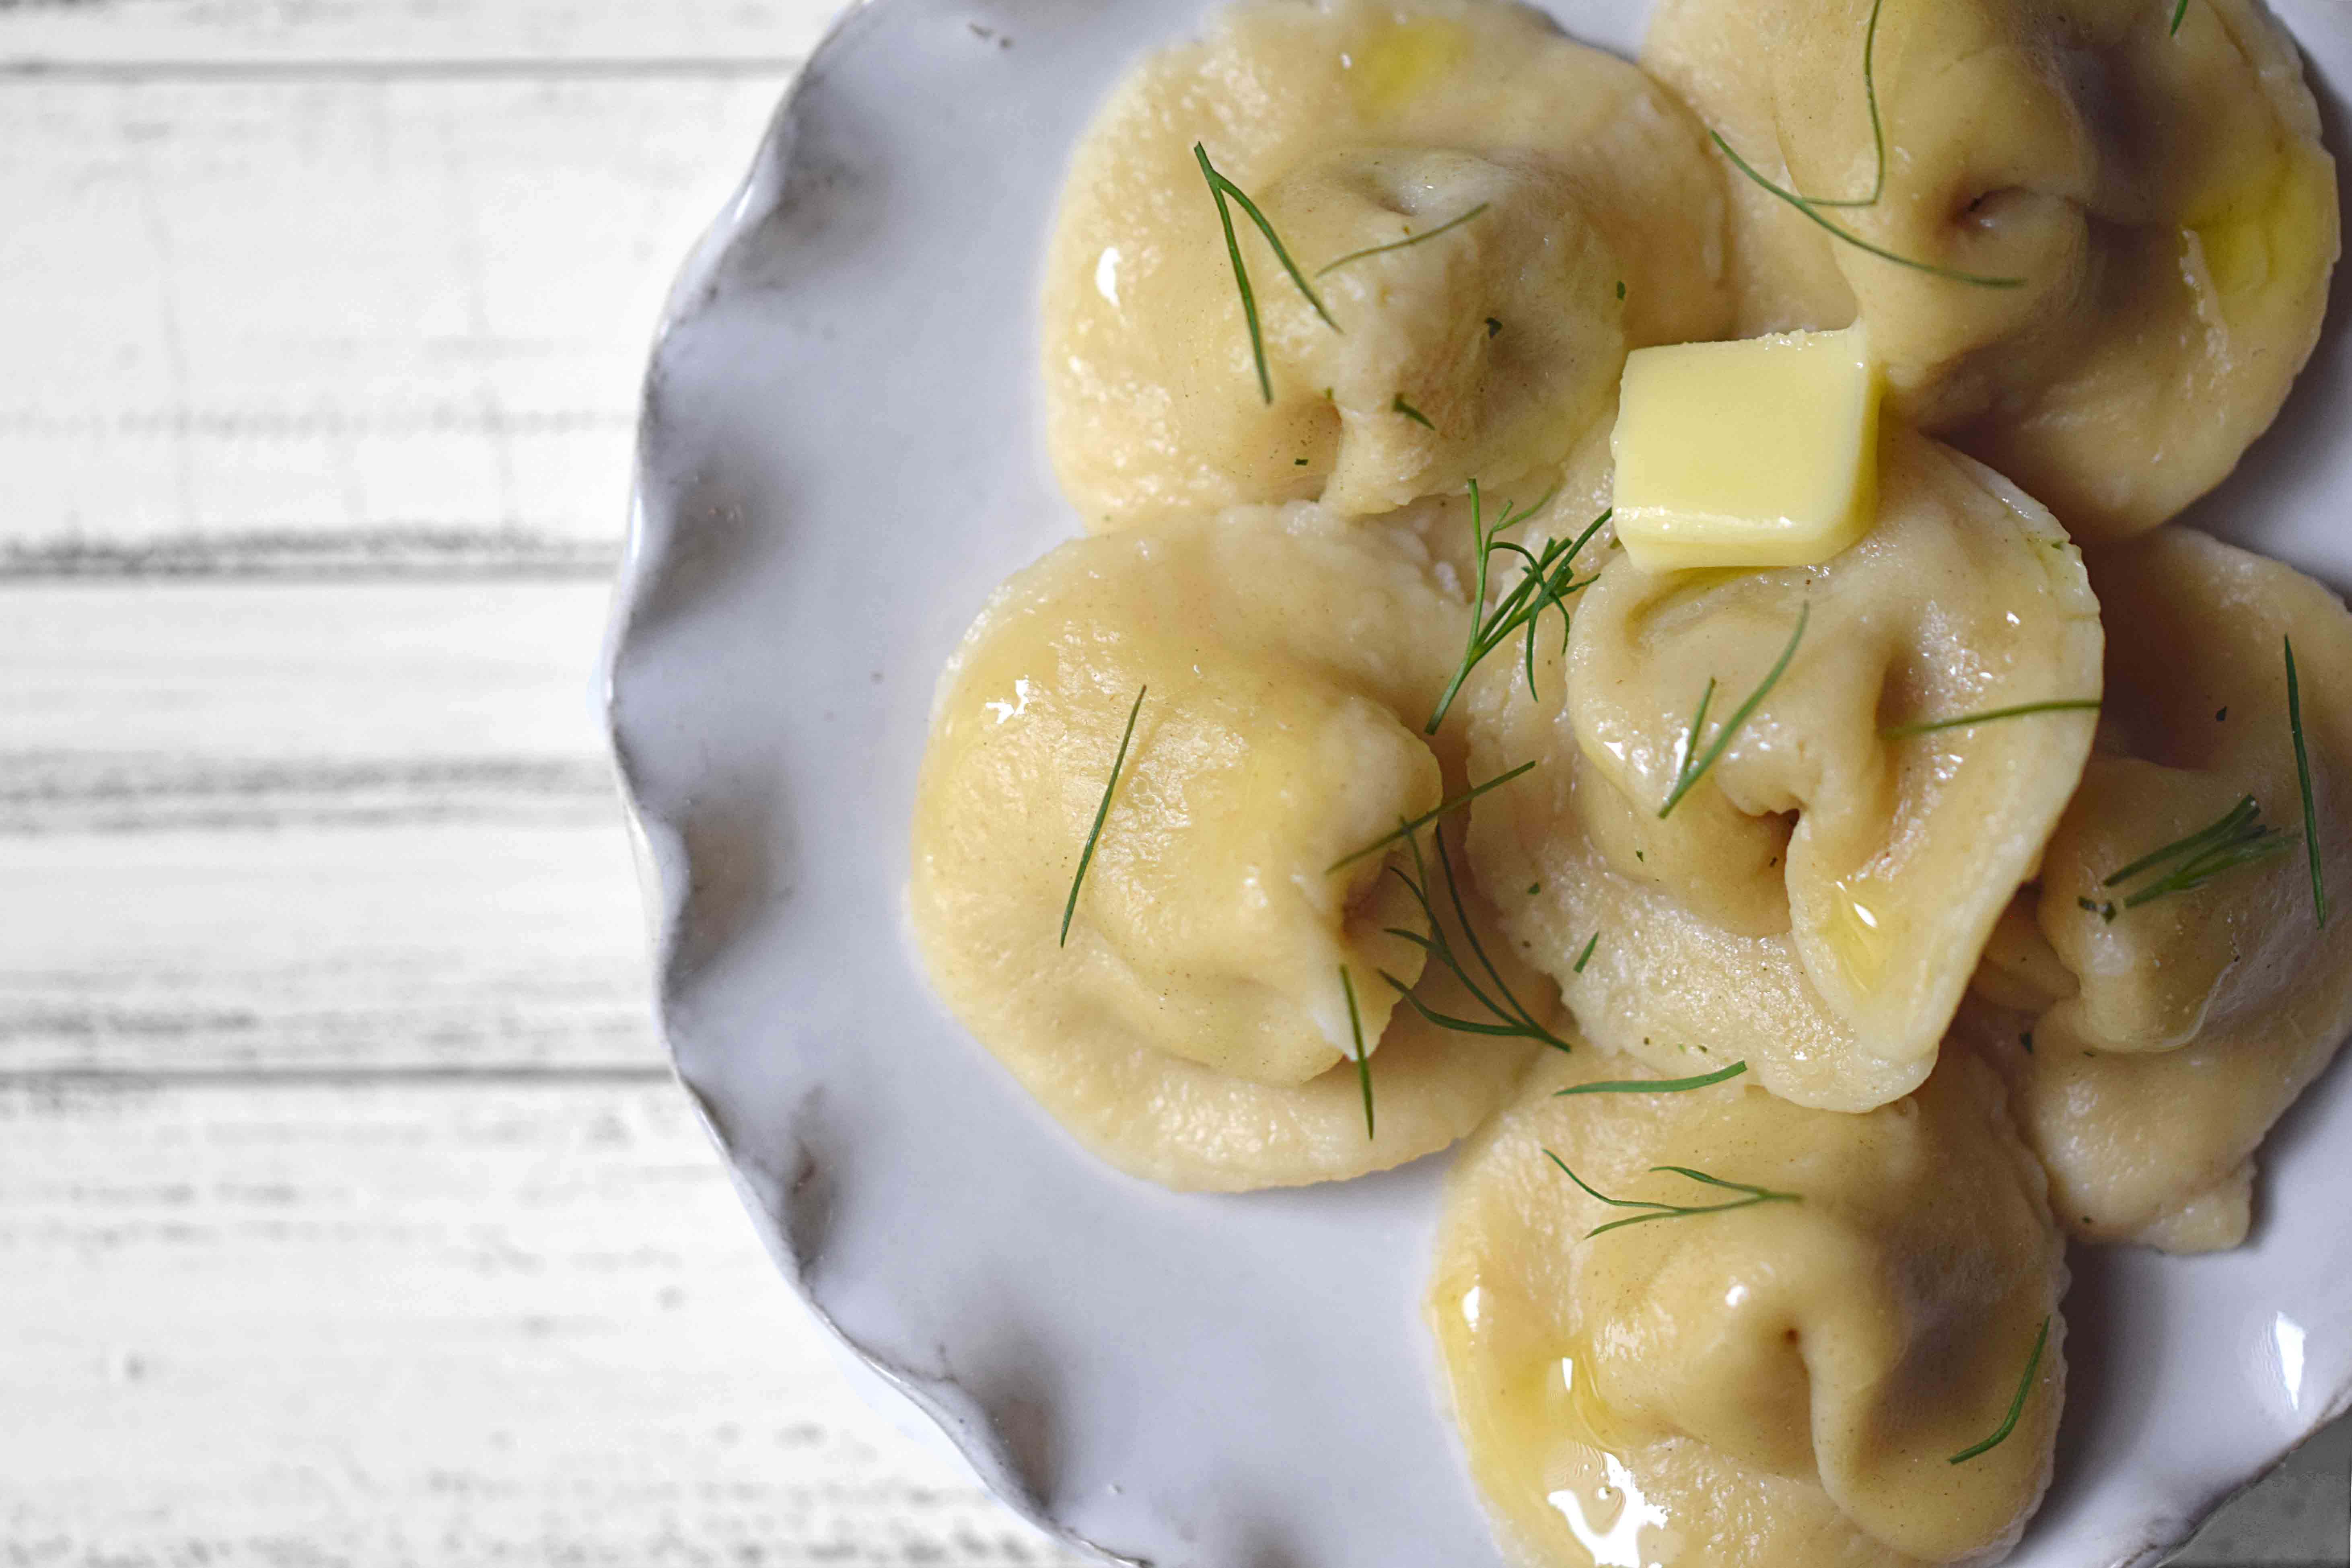
Pelmeni served in hot broth is my answer to these last of the winter days.
The recipe I’m sharing today was taught to me by my mother-in-law. Judit dreams of abandoning her business and opening a pelmeni food truck. She studied in socialist Leningrad (current day St. Petersburg) and used to arrive to student study sessions with a big pot of pelmeni to share. Her favorite food is pasta with cheese. Just pasta with cheese. But she’ll cook the most complicated dish just to watch her family enjoy it.
We begin by preparing the filling. In a bowl, mix ground pork and beef and grated onion and garlic. You can cover and set in the fridge while you work on the dough.
For the dough, if you are cool like my mother-in-law, you can mix flour and eggs by hand and little by little add water as you work on the consistency that will produce a ball of thick dough. This requires a lot of experience and skill since you need to feel when the dough is ready and the proportions are right.
If you’re not too experienced working with dough, you can do what I do: with pre-measured ingredient proportions, I first whisk together eggs, water and salt. I add flour little by little and mix it in with a wooden spoon. I keep adding and mixing with the spoon until it becomes too difficult to continue stirring and then continue mixing with my hands (still adding more flour until I’ve added it all).
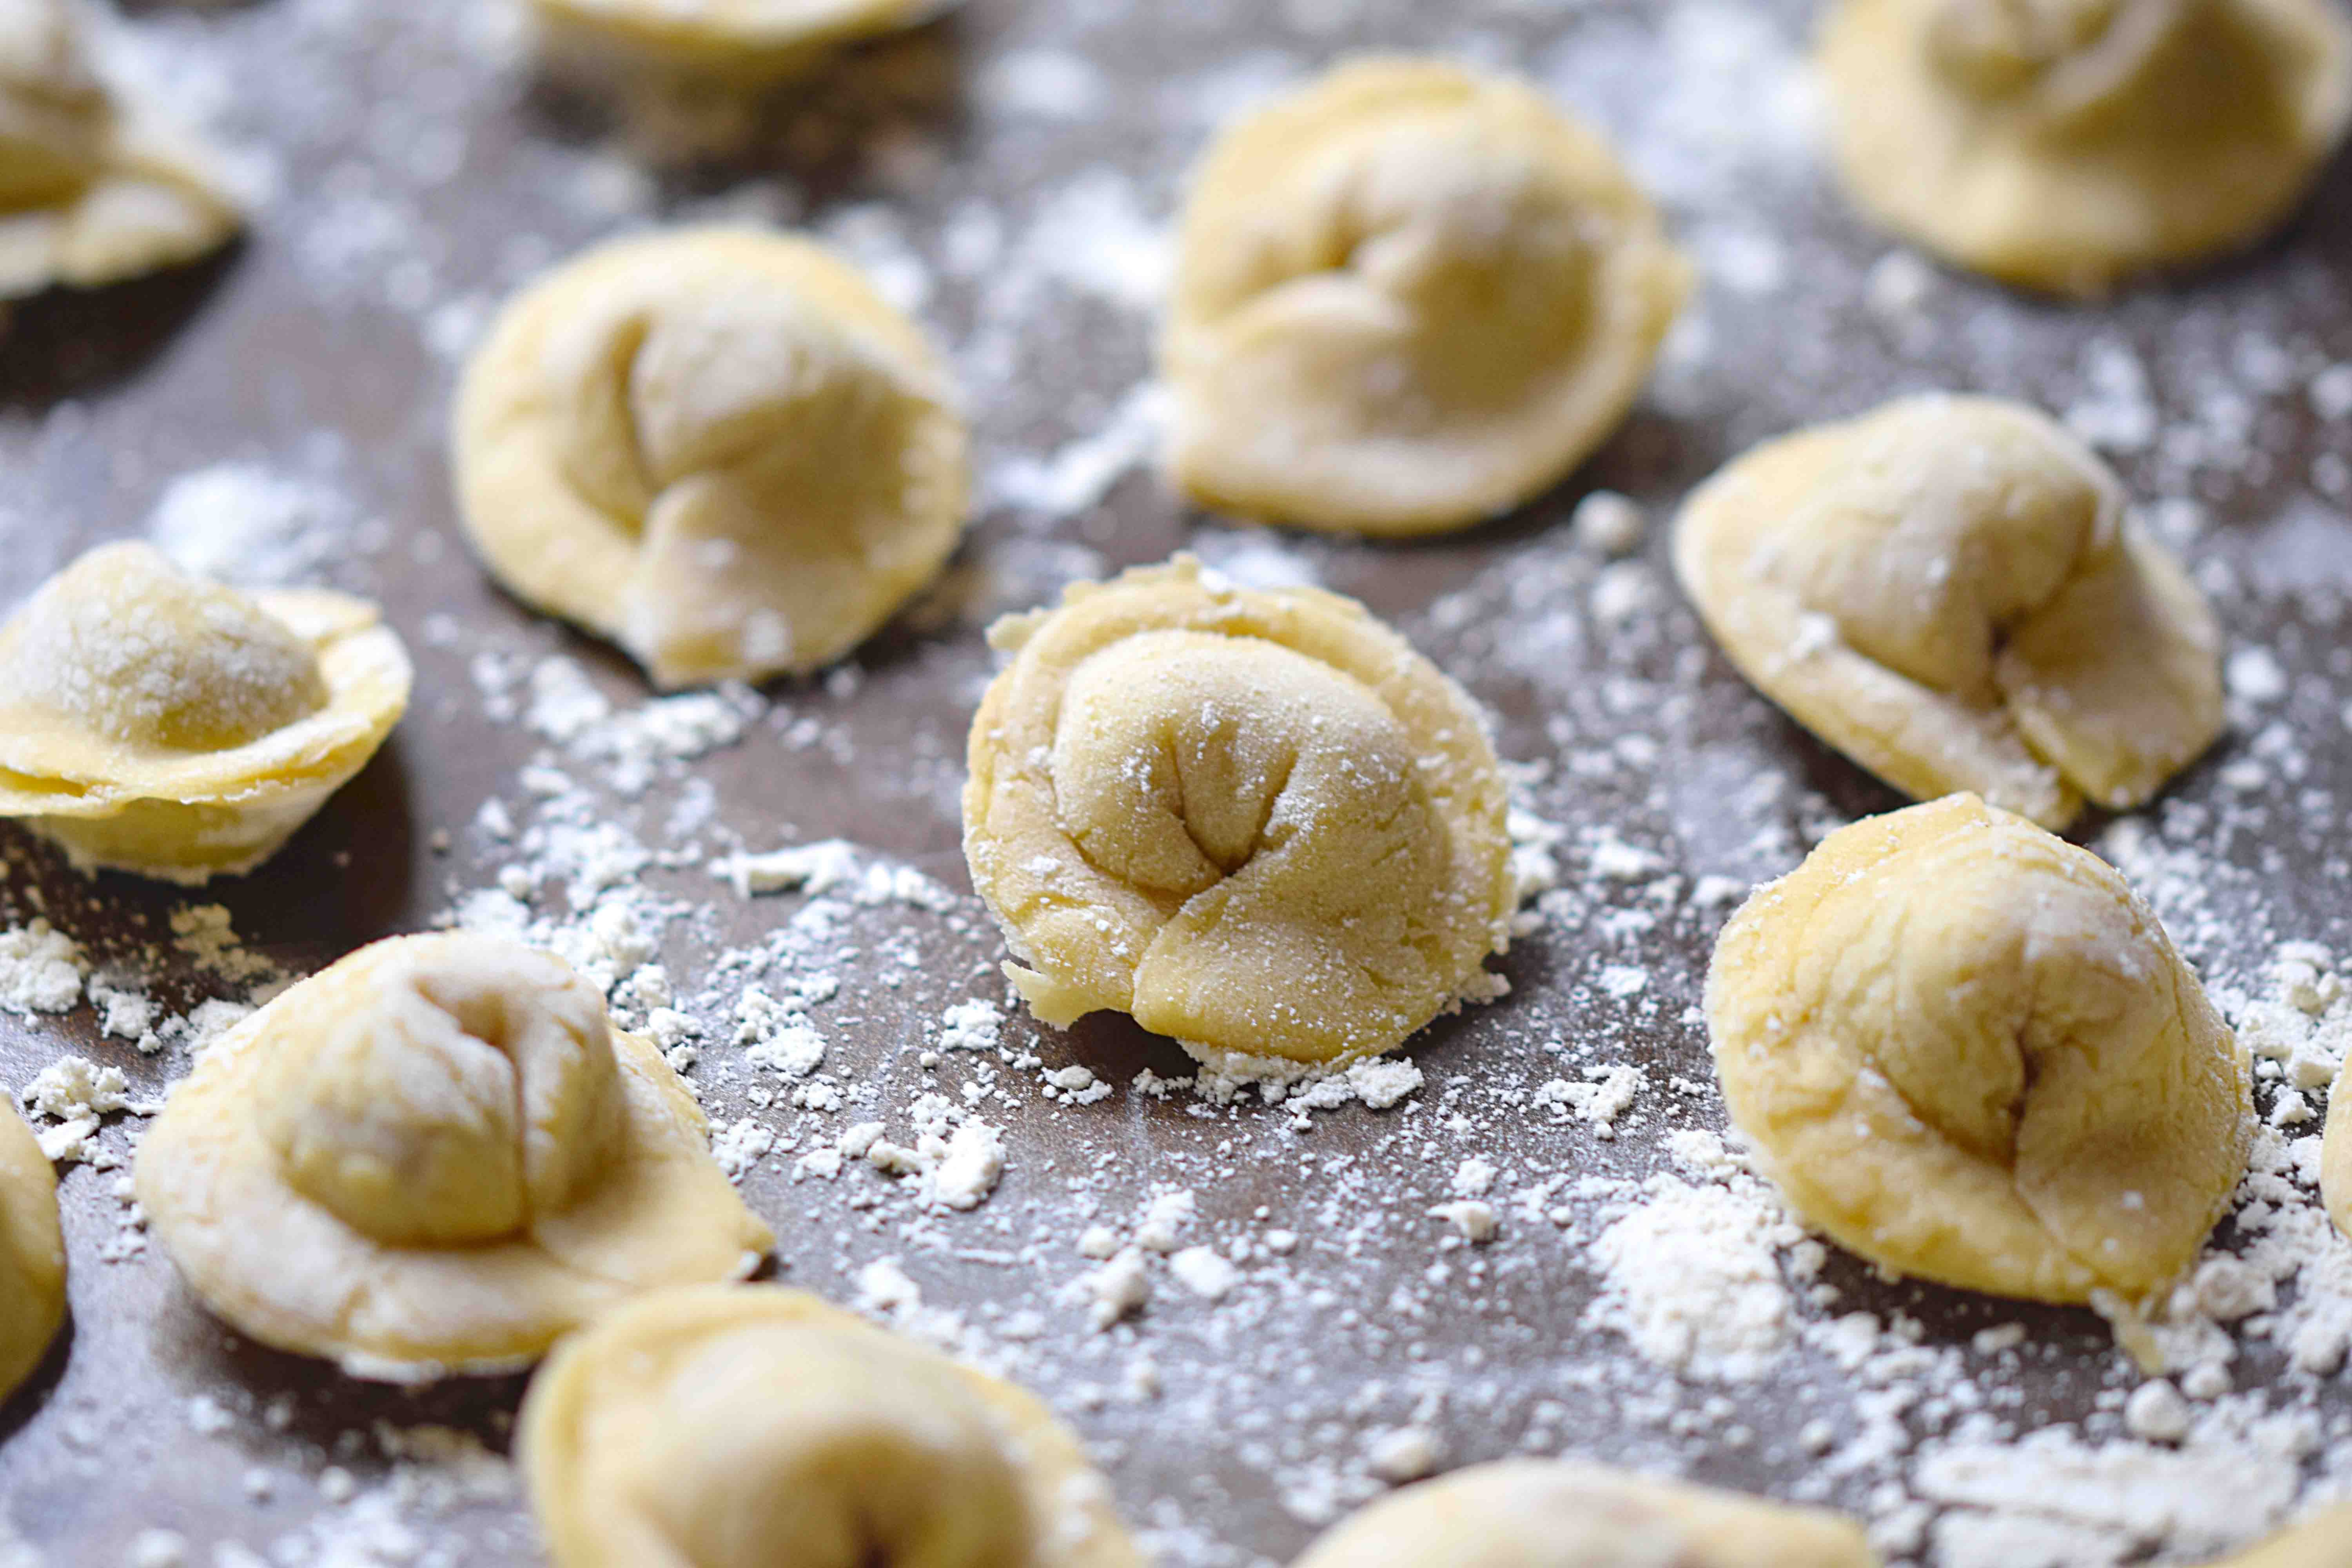
Dust your clean counter with flour and transfer the dough there. Knead the dough with your hands until you can produce a round ball. Next we will roll dough with a rolling pin. I like to work with the dough little by little so I just grab a portion of the dough and cover the rest with plastic. The dough dries up quickly so it’s important it be covered if you are not working with it.
Place the portion of the dough on the floured counter and roll it with a floured rolling pin. You can flip the dough after a couple of rolls to make sure it is not getting stuck and to dust it with more flour. Once it’s been spread thin, with a cookie cutter or anything with a circumference (i used a shot glass) cut 2″ circles.
Place a bit of the meat mixture into the middle of each circle. Now you’re ready to fold the pelmeni.

Grab the edge of the circle and fold inward to make a little taco. Press on the edges of dough that meet, making a little empanada. It’s important that the pelmeni is sealed or it might open during cooking. Next pull both edges together and pinch them where they meet.
If you made a whole bunch or you’re not ready to eat them, you can freeze them in a ziplock bag with a bit of flour so they don’t stick to each other. When you’re ready to eat them, (carefully) throw them into boiling water. Once they raise to the surface, wait about a minute or two and then fish them out with a slotted spoon.
As you prepare them, keep in mind portion sizes. I made the mistake of making these when I was famished. My “hand model” and I were juggling keeping sane, flouring, working, photographing and boiling a small batch just to pop them in our mouths as the floated. If you plan and work in advance making pelmeni can be relaxing, like meditation time. Or better yet, an excuse to bring everyone together and convene over assigned jobs of cutter, filling placer and folder.
Regarding portions, you can estimate about 30 per person if serving it with broth (more filling) or a bit more if serving them on their own. The husband, however, easily goes through 40-50 of these little guys in one sitting.
Ingredients
- For the filling:
- 1/2 pound ground beef, preferably grass-fed
- 1/2 pound ground pork, preferably organic
- 1/2 onion, grated with cheese grater or food processor
- 1-2 garlic cloves, grated or crushed
- 1/2 teaspoon sea salt
- For the dough:
- 2 eggs, preferably pastured
- 3 cups Einkorn or all-purpose flour you can get Einkorn flour here
- 2/3 cup filtered water
- 1/2 teaspoon sea salt
Instructions
- In a bowl, mix pork, beef, onion, garlic and salt. Combine well. Cover and place in fridge.
- In a large mixing bowl, whisk together water, eggs and salt. Add flour 1/2 cup at a time and continue mixing. Keep adding flour and mixing until you can no longer whisk. Remove whisk and mix with clean hands. Mix and knead dough until all flour has been added.
- Dust a work station with flour and transfer dough there. Knead dough by hand until it has absorbed all flour and you can form a ball of dough. Add dusting flour as needed.
- With a floured rolling pin, roll dough until it is very thin (but not thin enough to break). As you are rolling you can flip the dough to add more dusting flour and to make sure it's not getting stuck.
- With a cookie cutter (I used a shot glass) cut little 2 inch circles of dough.
- Take out meat mixture from fridge and spoon a bit onto the middle of each circle of dough.
- Fold the dough in half, so as to make a half moon and pinch edges together. Grab both ends of the half moon and pull together, lightly pressing the dough where they meet.
- Place each pelmeni onto a floured surface to prevent them from sticking together.
- You can freeze the pelmeni in a ziplock bagw ith a bit of flour or cook them and eat them!
- Fill a medium or big pot 2/3 with water and bring to a boil. Add a bit of salt and/or oil if you prefer.
- Carefully drop pelmeni into boiling water. Drop about 20-30 at a time. Once the pelmeni have risen to the surface, wait a minute or two then fish them out with a slotted spoon. Set aside and proceed to cooking the next batch.
- Serve them warm with a bit of butter or sour cream, vinegar to taste, black pepper and garnish them with dill if you like! Alternatively, you can serve them over hot meat broth with sour cream and white vinegar.
This article was featured on Foodgawker on March 12, 2015.


If i was to make this and freeze them, could i cook them from frozen?
definitely! freeze them in a ziplock bag and make sure you sprinkle them with a bit of flour so they don’t stick to each other. You can cook them from frozen just the same
OMG pellmell, I have my freezer always full with them, me and my husband are huge fans!
Mmmm I’ve never had pelmeni but I want some right now! Beautiful pics!
Awesome photo! These look really delicious :)
Thanks Emily! One of my favorite foods!